This tutorial is 1st in a series of articles for setting up CI for Android . I would try and cover the pre-configuration tasks to make sure all the requirements for configuring a Android build. This tutorial assumes you have a working Jenkins installation with a Jenkins user id which allows you to configure new Build Jobs on Jenkins and access to the Ubuntu machine for creating any Gradle/Android homes. Hope you have already read my earlier tutorial to build a Jenkins CI Server on Ubuntu. Installing Jenkins on Ubuntu.
Since the Jenkins has been setup already, we would continue with Android build setup : –
Step 1 – Install Android SDK
Go to Android Developer tools page – https://developer.android.com/studio/index.html & scroll to bottom of the page and find the section for SDK
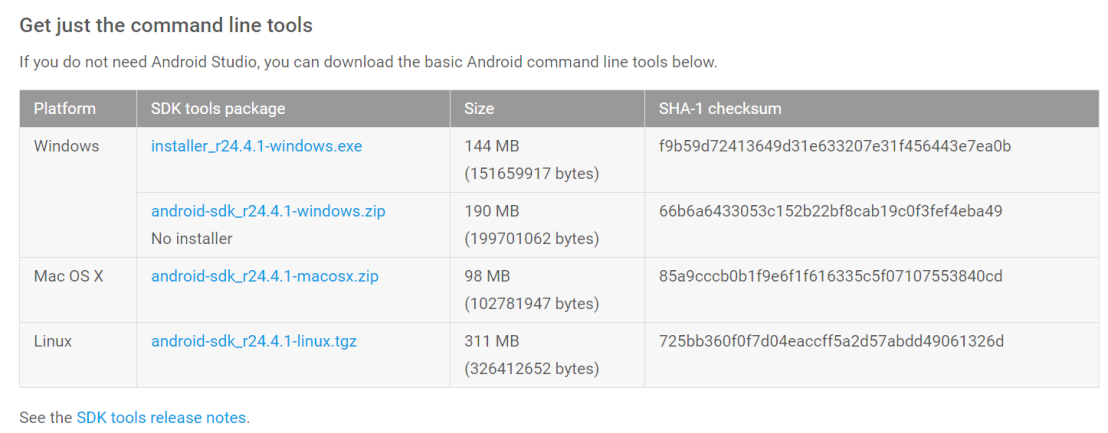
Copy the link from Linux version and use it to download Android SDK below
wget https://dl.google.com/android/android-sdk_r24.4.1-linux.tgz
It should take a few seconds /mins to download it based on network speed. Once downloaded, extract it from tarball as below: –
tar zxvf android-sdk_r24.4.1-linux.tgz
# move the folder extracted to a different partition/ volume to avoid filling up your root partition.
mv android-sdk-linux /opt2/android-sdk-linux
# You may remove the original tarball after the Sdk is extracted.
rm android-sdk_r24.4.1-linux.tgz
This would install android sdk in /opt2/android-sdk-linux directory and it would become your ANDROID_HOME.
Step 2 – Setup $Android_home$
Create a new file /etc/profile.d/android.sh and enter the below lines
export ANDROID_HOME="/opt2/android-sdk-linux"
export PATH="$ANDROID_HOME/tools:$ANDROID_HOME/platform-tools:$PATH"
This would make sure that ANDROID_HOME variable and the path variables are set globally for the Ubuntu server itself rather than just Jenkins.
Now you just need to logout and login on terminal again. If you are using a Ubuntu Terminal as of now, you would need to logout fully from the desktop, and login again. This is all because Ubuntu Terminal uses ‘Login-less’ terminal and it doesn’t invoke global profile when you launch the terminal from an existing Ubuntu session.
Once you are done setting android vars in global profile, restart the Jenkins.
Step 3 – Configure Jenkins Plugins
For Jenkins to build an Android app properly it would at least need few plugins to be installed
- Gradle Plugin – Android build scripts are mostly Gradle based so you need this plugin foremost (required)
- Android Lint plugin (recommended)
- Google Play Android Publisher Plugin (in case you want to automate app publishing (would need some extra security steps to keep signing keys secure). I would try to cover it in my next Blog
- Android Emulator Plugin – if you want to run tests on emulator (automated by Jenkins runner)
- JSLint plugin – for coverage analysis (recommended but not mandatory)
So lets go to Plugin Manager URL – direct http://192.168.0.32:8080/pluginManager/
Go to Available section and select all that you need to install. Jenkins may already have some based on previous projects it may have built.
Step 4 – Configure Gradle parameters
There are 2 major ways we can configure the Gradle parameters. Either we pass each paramter on GRADLE_OPTS global var or just configure GRADLE_OPTS to point the Gradle User Home and then keep all the parameters in the $GRADLE_USER_HOME/gradle.properties
I would try to explain both the approaches : –
Option 1. Configure all params in GRADLE_OPTS. This is preferred option if you don’t have a lot of parameters to be passed to Gradle / Gradle Wrapper. For this , Go to Jenkins –> Manage Jenkins –> Configure System.
Create a new global variable GRADLE_OPTS under Global Properties section and just click Save. If you have the variable already you can just append this property. It would reflect for all future builds.
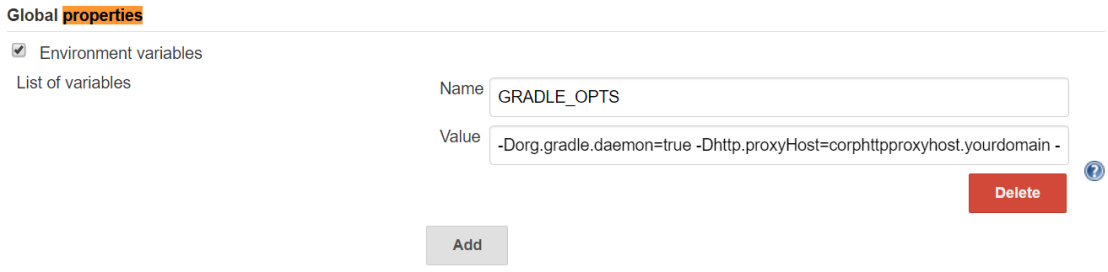
Now we will configure these parameters to make sure Gradle runs in daemon process and configure any proxy settings if any.
GRADLE_OPTS = -Dorg.gradle.daemon=true -Dhttp.proxyHost=corphttpproxyhost.yourdomain -Dhttp.proxyPort=3128 -Dhttps.proxyHost=corphttpsproxyhost.yourdomain -Dhttps.proxyPort=3129
Option 2. Create Gradle User Home we can use this option to make sure that all the configurations , Gradle build tools go in this directory and we only make sure that this directory is configured as Gradle User Home on GRADLE_OPTS variable. This directory can be anywhere on the build machine but needs to be secured and only jenkins user should be able to read and write on it. The gradle.properties file in this folder can also be used to keep credentials storage in encrypted format. Lets create the directory and make owner of the directory as jenkins:jenkins
$ mkdir /opt2/.gradlehome
$ cat <<EOF >> /opt2/.gradlehome/gradle.properties
org.gradle.daemon=true
systemProp.http.proxyHost=proxy.company.net
systemProp.http.proxyPort=8181
systemProp.https.proxyHost=proxy.company.net
systemProp.https.proxyPort=8181
systemProp.https.nonProxyHosts=*.company.net|localhost
EOF
$ sudo chown -R jenkins:jenkins /opt2/.gradlehome
$ sudo chmod -R 770 /opt2/.gradlehome
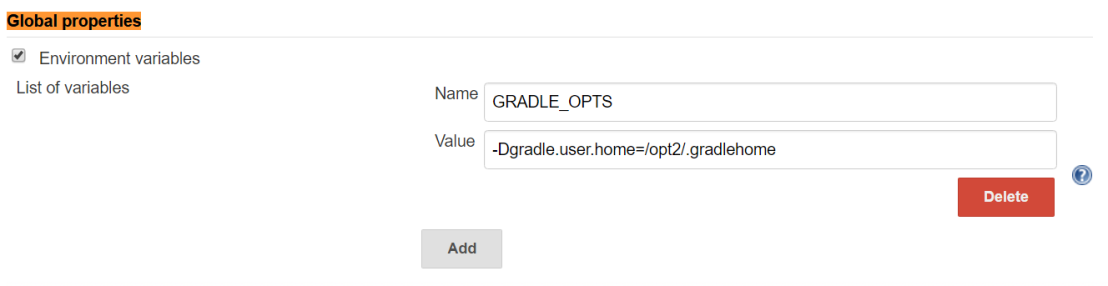
Configure GRADLE_OPTS to use the Gradle User home we defined above. This should reflect for any future builds without any restart. Create a new global variable GRADLE_OPTS under Global Properties section and just click Save. If you have the variable already you can just append this property. It would reflect for all future builds
-Dgradle.user.home=/opt2/.gradlehome
With this we have met all the requirements for configuring a Android build job and are ready to jump to the next Part (Part 2).
Like always, any comments , feedback are welcome.
References

One thought on “Part 1 – Setting up Android build on Jenkins”